Hit Points Explained: The Small Part That Changes Everything
Your shears are sharp. You just had them sharpened. The tension feels right. But something is wrong.
Hair folds between the blades instead of getting cut cleanly. You have to close harder to get through a section. The tips work fine but the middle of the blade is useless. You adjust the tension tighter, which helps for an hour, then the problem comes back.
The edge is not the problem. The tension is not the problem. The hit point is the problem.
What Is the Hit Point?
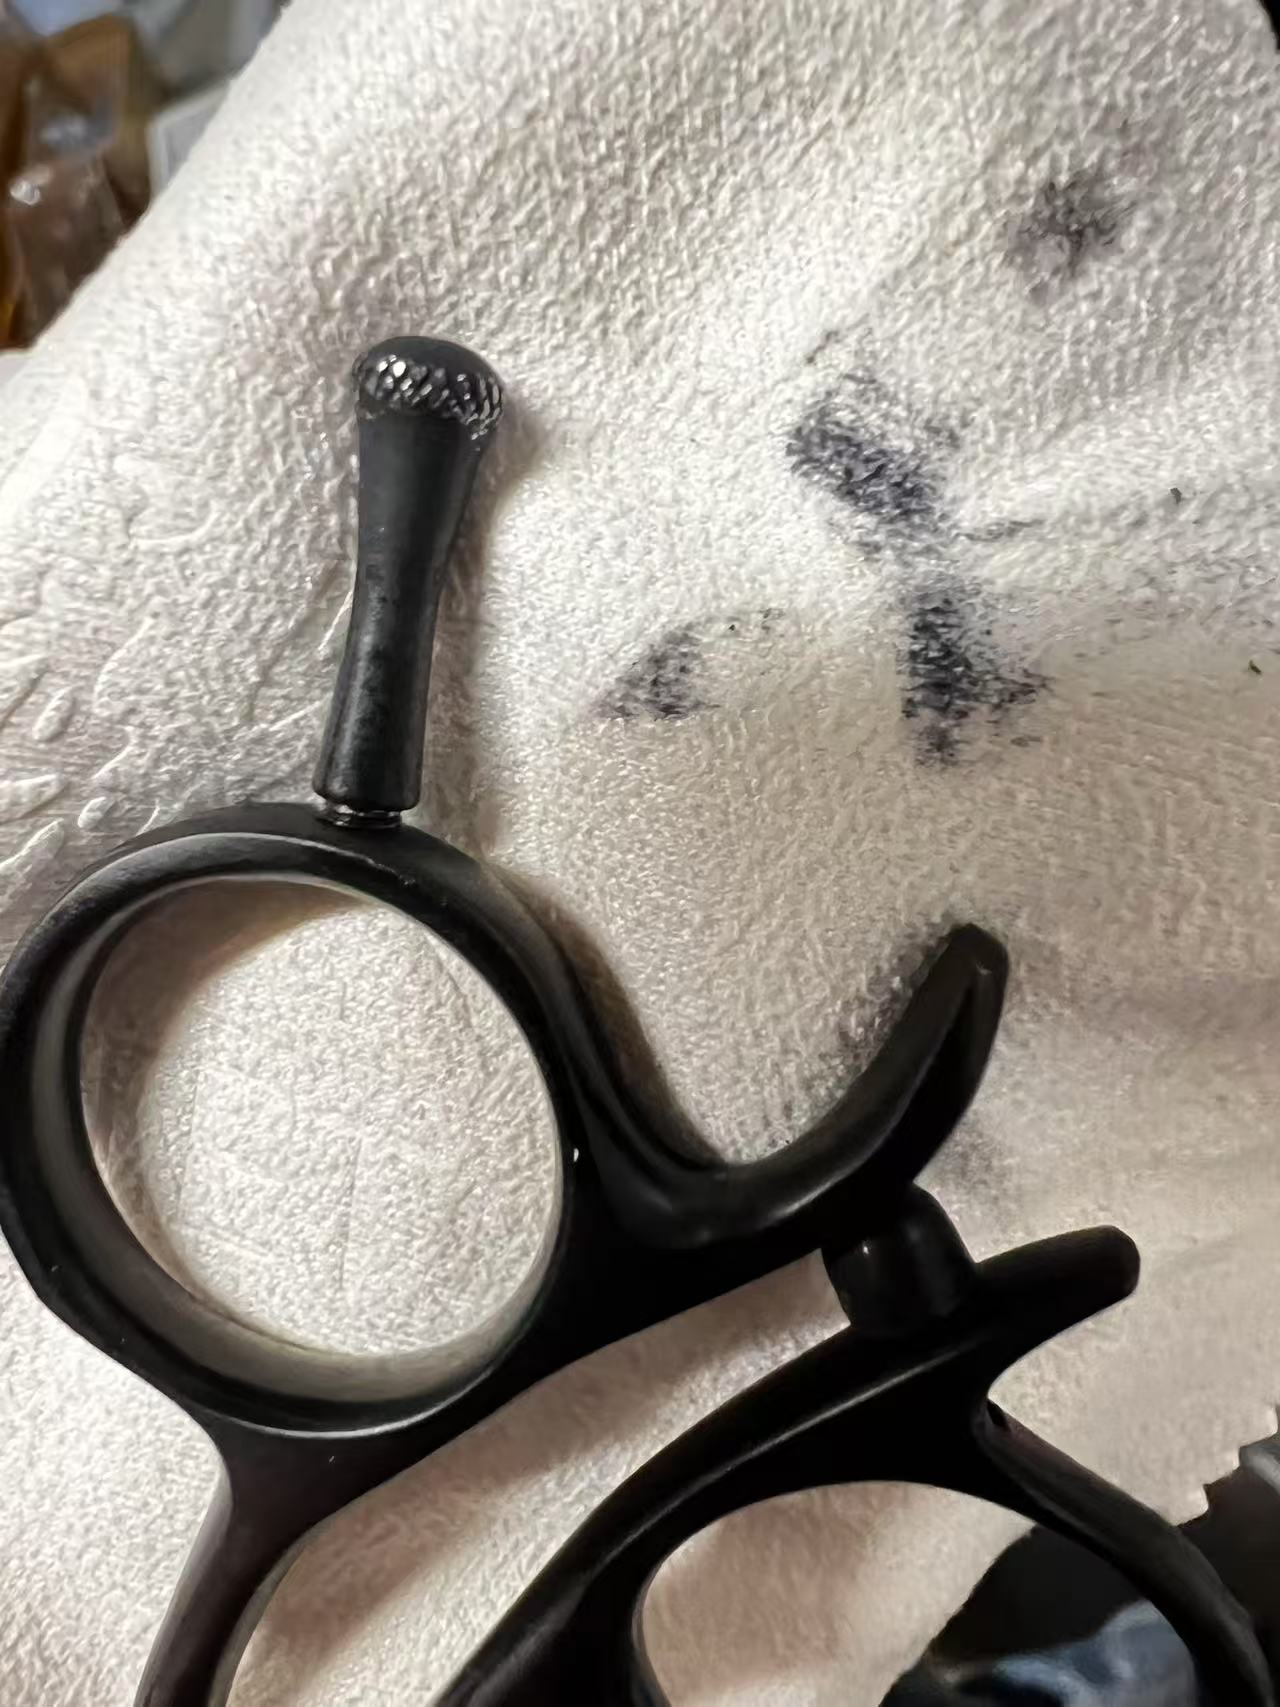
The hit point (ヒットポイント, hitto pointo) is the contact area where the two blades meet at the pivot. In English, it is sometimes called the “ride” or the “half-moon” (半月, hangetsu). If you open your shears and look at the area immediately surrounding the pivot screw, you will see a small, smooth, slightly raised surface on each blade where they press against each other.
This is the hit point. It is typically smaller than your thumbnail. And it controls everything.
The hit point is the fulcrum of your shears. Every bit of force you apply through the handles passes through this tiny contact area before reaching the blades. The precision of this surface determines whether that force translates into clean cutting or frustrated folding.
Why Japanese Training Considers It Fundamental
In Japanese shear education, the hit point is taught as one of the most important parts of the shear. The Japanese technical vocabulary treats it as a named anatomical feature (ヒットポイント or 半月) with specific maintenance requirements.
Western shear education tends to focus on the blade and the edge. Sharpen the blade, adjust the tension, and everything should work. The hit point, if it is discussed at all, gets lumped in with “general maintenance.”
This difference in emphasis matters because the hit point is the single most common cause of cutting problems that get misdiagnosed as dull blades or bad tension.
Think about it this way: your shears are two levers meeting at a pivot. The blade edges are the business end, but the hit point is the mechanical interface that controls how those edges meet. If the interface is worn, damaged, or misaligned, no amount of edge sharpness will compensate.
How the Hit Point Works
When your shears close, the blades do not press flat against each other along their entire length. That would create enormous friction and require tremendous hand force.
Instead, the blades only touch at a narrow point of intersection that moves from pivot to tip as you close. The hollow grind (裏スキ, urasuki) on the inner face of each blade creates this gap. The static blade provides the fixed reference surface while the moving blade closes against it. The blades touch only where the cutting action is happening at that instant.
The hit point controls the pressure at that intersection point. It is the area where the two blades bear against each other at the pivot, and its condition determines how consistently that intersection point maintains contact as it travels from pivot to tip.
A well-maintained hit point means even, consistent blade contact along the entire length. A worn hit point means inconsistent contact, which creates dead spots where the blades separate instead of cutting.
The Symptoms of a Worn Hit Point
If your hit point is worn, you will notice some or all of these:
Hair folding instead of cutting. This is the classic symptom. The blades push hair to one side instead of shearing through it. It usually starts in the middle section of the blade and gradually worsens.
Inconsistent feel along the blade length. The tips cut fine. The area near the pivot cuts fine. But somewhere in the middle, the cut quality drops. This is because the worn hit point is not maintaining consistent blade pressure across the full travel.
Tension that never stays right. You tighten the screw and it feels good for a while, then the problem returns. This happens because you are trying to compensate for a worn mechanical surface with screw pressure. The screw can change overall tension, but it cannot restore the precise geometry of the hit point.
Clicking or rough feeling at the pivot. If the hit point is significantly worn, you may feel (or hear) irregularities when you open and close the shears slowly. A healthy hit point produces a smooth, silent ride. A damaged one clicks, catches, or feels gritty.
Increasing hand fatigue. When the hit point is not doing its job, you unconsciously grip harder to compensate. Over a full day of cutting, that extra effort adds up.
How to Check Your Own Shears
You can assess your hit point condition with a simple test that takes about thirty seconds:
Step 1: Clean your shears and dry them completely.
Step 2: Open the blades to about 90 degrees. Look at the area right around the pivot screw on both blades. You should see a smooth, slightly convex surface where the blades press together. This is the hit point.
Step 3: Close the blades very slowly while watching the cutting edges. The blades should maintain contact (you should see a tiny line of light between them that stays consistent, not a gap that opens and closes) as they travel from pivot to tip.
Step 4: Do the gravity test. Hold the shears vertically with the screw facing you. Open the blades to about 90 degrees. Release the moving (thumb) blade. It should close slowly and stop about halfway. If it drops closed immediately, your tension is too loose. If it barely moves, too tight. If it drops to about the right point but feels jerky or uneven on the way down, your hit point may be worn.
Step 5: Run your fingertip very gently across the hit point surface on each blade. It should feel completely smooth. Any roughness, grooves, or unevenness indicates wear.
If you notice any of these issues, the fix is not a tension adjustment and not a sharpening. It is a hit point service.
What Causes Hit Point Wear
Normal use. That is the honest answer. Every time you open and close your shears, the hit point surfaces bear against each other. Over thousands of cuts, material gradually wears away.
But some things accelerate the process:
Running shears too loose. When tension is too low, the blades wobble slightly at the pivot. This creates uneven wear on the hit point surfaces. Consistent, appropriate tension keeps wear even and extends hit point life.
Hair and debris in the pivot area. Cut hair, chemical residue, and dust that accumulate around the pivot act as abrasives between the hit point surfaces. Regular cleaning and oiling of the pivot area significantly slows hit point wear.
Dropping shears. Impact can dent or deform the hit point surfaces. Even if the blades and edge look fine after a drop, check the hit point area for damage.
Incorrect sharpening. A sharpener who disassembles your shears for sharpening and does not properly inspect and service the hit point during reassembly is leaving a critical maintenance step undone. According to industry maintenance standards, a proper professional sharpening service includes hit point inspection, and replacement of consumables like washers and bumpers.
What to Tell Your Sharpener
When you bring your shears in for service, specifically ask about the hit point. Here is what to say:
“Can you inspect the hit point and ride area? My shears have been folding hair in the middle section, and I think the hit point may be worn.”
A qualified sharpener will know exactly what you mean. They will disassemble the shears, inspect the hit point surfaces, and either polish them back to specification or recommend replacement parts (some manufacturers use resin packing in the ride area that can be replaced).
If your sharpener does not know what a hit point is, or tells you that a sharpening will fix a folding problem, find a different sharpener. Sharpening addresses the blade edge. Hit point wear is a separate mechanical issue that requires separate attention.
Some manufacturers include hit point service as part of their factory maintenance program. If your shears are still within the manufacturer’s service network, this is often the best option. The factory technicians know the exact specifications for your model’s hit point geometry.
Hit Point Maintenance Between Services
You cannot restore a worn hit point yourself. That requires professional tooling. But you can dramatically slow the wear process:
Keep the pivot area clean. After every client, use a soft cloth to wipe around the pivot screw. Remove any visible hair or debris.
Oil the pivot regularly. A drop of shear oil on the pivot screw area, followed by several open-and-close cycles to distribute it, keeps the hit point surfaces lubricated and reduces metal on metal wear.
Maintain proper tension. Check tension at least weekly. The gravity test described above takes seconds. Keeping tension in the correct range prevents the wobble that causes uneven hit point wear.
Store shears closed. Open shears are vulnerable to impacts on the exposed hit point surfaces. Always store with blades closed in a case.
The Hit Point and New Shears
If you just bought new shears, the hit point is part of the break-in process. The hit point surfaces on new shears have not yet polished each other into their final conformation. During the first 10 to 20 haircuts, the surfaces seat against each other and the action smoothes out. This is partly why Japanese manufacturers recommend a narashi-giri (慣らし切り) break-in period starting with soft hair.
The Big Picture
The hit point is probably the least discussed and most important part of your shears. A perfect edge with a worn hit point produces mediocre cuts. A good edge with a well-maintained hit point produces excellent cuts.
Japanese shear education gets this right by treating the hit point as fundamental knowledge.
Next time your shears feel “off” and you cannot figure out why, look at the pivot. The answer is usually right there, in a smooth surface smaller than your thumbnail that nobody told you about.
Sources: Hit point anatomy and function from Japanese technical shear references and manufacturer documentation. Gravity tension test methodology from Kasho care instructions. Hit point service standards from Japanese sharpening specialist protocols. Narashi-giri connection from Naruto Scissors care documentation.


