Scissor-Over-Comb Mastery
Master rhythmic scissor-over-comb work for fades, tapers, and precision men’s cuts.
Scissor-over-comb is a rhythm technique: the comb controls the length, the shear follows the comb, and your body position determines consistency. Master the rhythm on mannequins before touching a client.
Why scissor-over-comb matters
Scissor-over-comb is the foundation of precision men’s cutting and short-hair work for all genders. Unlike clipper-over-comb, shears give you infinitely variable control over the amount of hair removed with each pass. You can create gradual fades, soft tapers, and seamless blends that clippers struggle to match, especially on hair that grows in multiple directions or has resistant cowlicks.
The technique is also quieter and less intimidating for clients who dislike the buzz of clippers. Many high-end barbershops and salons use scissor-over-comb exclusively to signal craftsmanship and precision.
Tool selection
| Tool | Specification | Why |
|---|---|---|
| Primary shear | 6.5-7.0” beveled or micro-serrated | Longer blade covers more hair per stroke; serration provides grip |
| Taper comb | Fine-tooth barber comb | Controls hair elevation and guides the shear |
| Finishing comb | Wide-tooth | Checks blend after each section |
| Optional | Swivel handle shear | Reduces wrist rotation fatigue on long services |
For steel, 440C handles the frequent comb contact well without chipping. Premium options like Ichiro and Jaguar offer longer shears specifically designed for comb work. Budget options from Mina in the 6.5” range work well for learning.
Step-by-step technique
1. Position and baseline
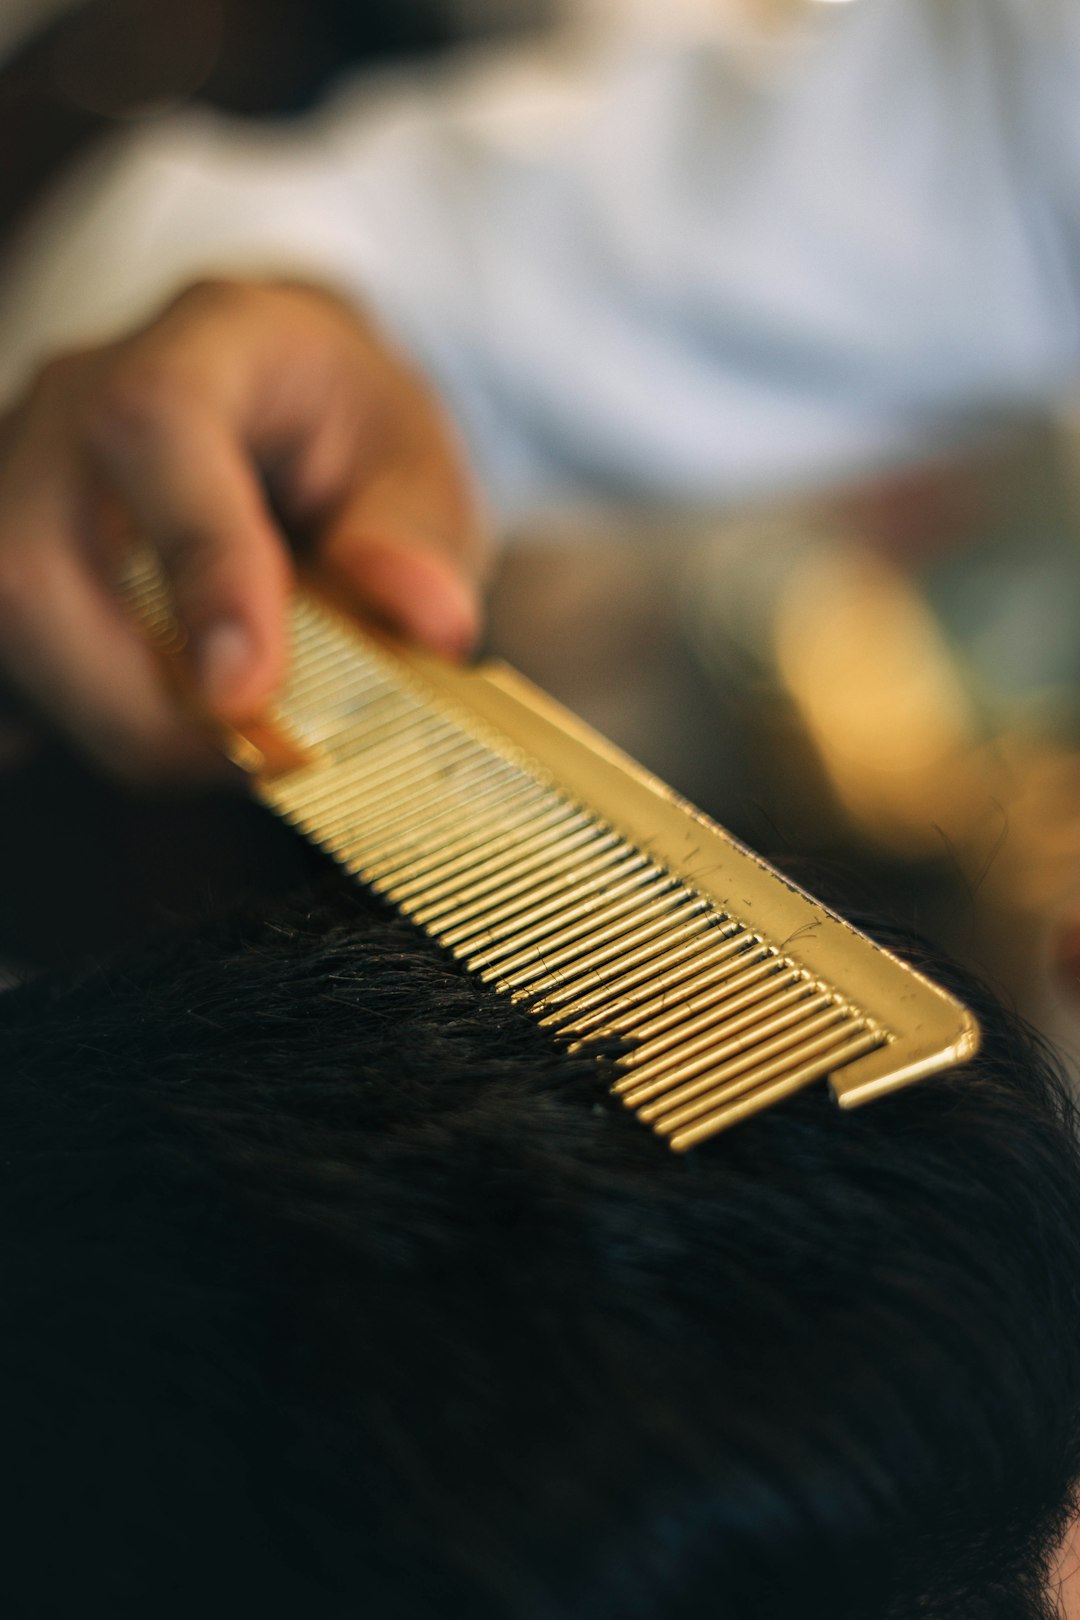
Stand directly behind or beside the section you are cutting. Insert the comb at the baseline, the lowest point of the desired length. The comb teeth should point upward, with the spine of the comb resting against the scalp.
2. Lift and hold
Lift the comb upward slowly, catching the hair between the teeth. Stop when the desired amount of hair extends beyond the comb teeth. The comb must remain stationary once positioned; any movement during cutting creates unevenness.
3. Cut with rhythm
Open and close the shear in a rapid, rhythmic motion while the comb holds the hair. The shear blade should follow the comb spine precisely. Think of it as the shear dancing along the comb: quick, consistent open-close movements that remove a thin layer of hair with each pass.
4. Overlap and blend
Move to the next section, overlapping with the previous cut by about half the comb width. This overlap is what creates seamless blending. Work in consistent patterns (left to right, bottom to top) so you never lose track of where you have been.
Fade and taper variations
The angle of the comb determines the graduation:
- Vertical comb. Creates a hard, defined fade line. Use for skin fades and high fades where contrast is desired.
- 45-degree comb. Produces a medium blend. The most versatile angle for general tapering.
- Nearly flat comb. Creates the softest taper. Use for conservative, natural-looking necklines and temple blends.
Switch comb spacing during the service: fine-tooth for tight blending near the skin, medium for midway transitions, and wide-tooth for checking the final blend.
Body mechanics
Scissor-over-comb is physically demanding. Your wrist, elbow, and shoulder work continuously throughout the service:
- Keep your elbow low and close to your body to reduce shoulder strain
- Adjust the chair height so you work at natural arm level; reaching up or bending down causes fatigue within minutes
- For offset or crane handles, your thumb does the moving while your fingers stay still
- Take micro-breaks every 10 minutes: put the shear down, shake out your hands, roll your shoulders
Troubleshooting
| Problem | Likely cause | Fix |
|---|---|---|
| Visible weight lines | Comb angle inconsistent between passes | Pick one angle per zone and maintain it |
| Hand fatigue after 15 minutes | Shear too heavy or handle wrong type | Try a lighter shear or swivel handle |
| Uneven sides | Not using reference points | Mirror-check after every 3 passes; use ear, temple, and occipital bone as landmarks |
| Dragging or pulling | Dull blade or hair caught in pivot | Clean pivot, oil daily per daily protocol |
| Choppy texture | Shear opening too wide per stroke | Reduce opening to 1-2mm, increase speed |
Practice plan
Build your scissor-over-comb rhythm on mannequins before clients:
- Week 1-2: 3 mannequin fades per week focusing on one comb angle. Time each service.
- Week 3-4: Add angle variation: practice vertical, 45-degree, and flat comb on the same mannequin.
- Ongoing: Film your technique, compare blade-comb alignment frame by frame, share with a mentor.
Combine with Men’s Fade with Shears for complete fade training. For maintaining your longer shears, follow the sharpening frequency matrix; comb contact accelerates edge wear significantly.
See Also
Verified Sources
- Tertiary 🇯🇵 Ofa-s Hair Salon — Cutting Techniques Column (salon professional blog)
- Secondary 🇯🇵 Morikoshi / SENJYU Professional Team (education reference)
- Secondary 🇯🇵 JobVR — Haircut Types Guide (education reference)
Frequently Asked Questions
Use a 6.5 to 7.0 inch shear with a beveled or micro-serrated edge for grip. The longer blade covers more hair per stroke which is essential for building consistent fades and tapers without visible weight lines.
Build rhythm by inserting the comb at baseline, lifting hair while keeping the comb stationary, and opening and closing the shear rapidly while moving upward. Practice on mannequins and foam heads to build speed before working on clients.
Look for longer shears in the 6.5 to 7.0 inch range with micro-serrated edges. Mina offers solid options for this length in the budget tier while Ichiro and Juntetsu provide premium convex and beveled edges for smoother fade blending.