Blunt Cutting Precision Playbook
Deliver flawless blunt lines with balanced tension, body alignment, and appropriate shear selection.
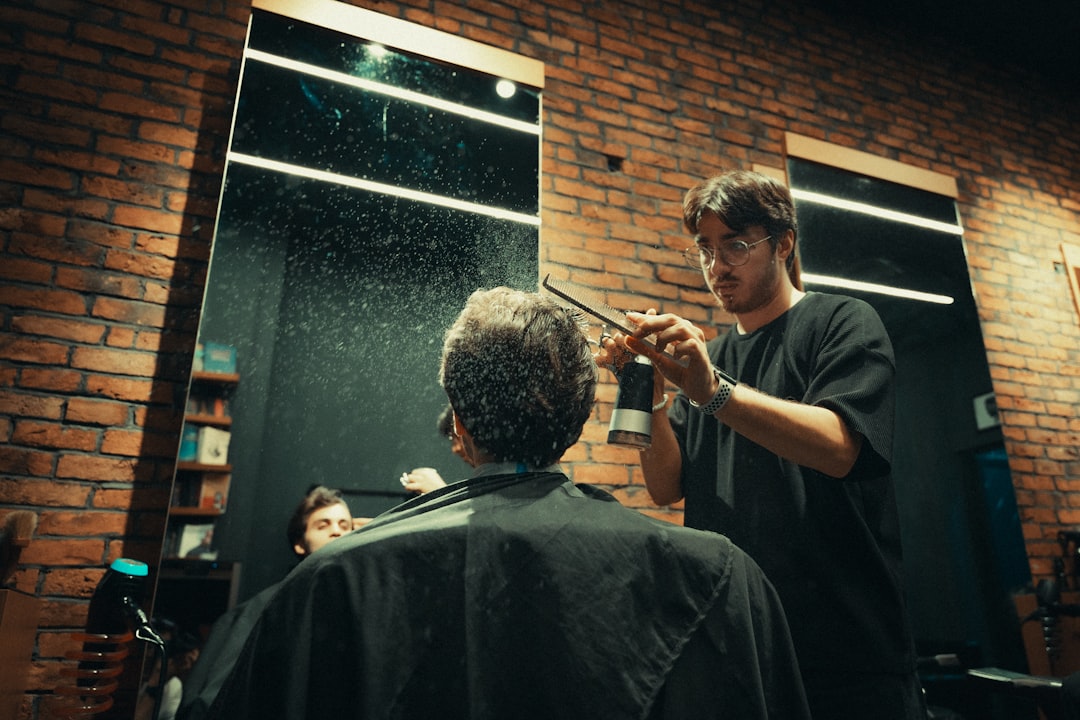
Blunt cutting demands absolute consistency in tension, elevation, and body position; the technique itself is simple, but the discipline to maintain it across every subsection is what separates a clean line from a compromised one.
What blunt cutting delivers
Blunt cutting terminates every hair in a section at the same point, producing a solid, unbroken line. It is the structural backbone of bobs, one-length cuts, and any style where a clean perimeter defines the shape. Because there is no texture to disguise errors, blunt cutting exposes every inconsistency in tension, elevation, and body position. Mastering it builds the discipline that carries into every other cutting technique.
Pre-cut checklist
- Shears: 5.5”–6.0” with micro-serrated or balanced convex edge. Micro-serrated edges grip the hair for clean blunt lines; convex edges provide a smoother finish. Mina and Ichiro offer well-regarded options in this range.
- Handle type: An offset handle keeps the wrist in a neutral position during prolonged perimeter work.
- Client prepped: Detangled, evenly damp, combed into natural fall. Uneven moisture causes sections to behave differently, which ruins line consistency.
- Sectioning: Establish a center-to-apex part and divide into quadrants. Use sectioning clips to keep non-working hair completely out of the way.
Tension consistency: the make-or-break factor
Tension is the single greatest variable in blunt cutting. Inconsistent tension produces uneven lines even when your elevation and body position are correct.
- Calibrate your hold: Before starting, pull a test section with your cutting tension and note the stretch. Every subsequent section must match that stretch exactly.
- Finger placement: Hold the subsection between the index and middle fingers, approximately 1 cm from the cutting line. Fingers too far from the line reduce control; too close risks nicking skin.
- Tension direction: Always pull tension straight down toward natural fall for zero-elevation cuts. Pulling forward, backward, or to the side introduces over-direction that shifts the cut line.
- Wet vs dry tension: Wet hair stretches more than dry hair. If you cut a blunt line on wet hair with heavy tension, the line will appear shorter and uneven once dry. Use moderate, consistent tension; never maximum pull.
Cutting sequence
- Establish first guideline at the center nape, combing hair to natural fall. Keep fingers parallel to the floor. This guideline anchors the entire cut; take extra time to get it right.
- Build from center outward. Take 0.5 cm subsections moving from center nape toward each ear. Include a sliver of the previous guideline in each new section so you can see where to cut.
- Mirror alignment. Step back after every two to three subsections to confirm the line from a distance. Close-range vision hides gradual drift.
- Traveling guideline. The guideline travels with you as you move forward. Each new section references the previous one, creating a continuous line. Never skip a section or jump ahead.
- Temple to fringe. Switch your body position to face the client. Continue the line to the desired length, maintaining the same tension calibration.
- Cross-check. Take vertical sections through the perimeter and check for weight inconsistencies or bumps. Correct any deviations before the client leaves the chair.
Body mechanics for maintaining level lines
Your body is the frame that holds the cutting line steady. Poor posture introduces angular errors that compound across sections.
- Stand directly in front of the section you are cutting. Moving even 15 cm off-center changes the angle of your fingers relative to the floor.
- Keep your elbow low and wrist neutral. Adjust the chair height to bring the cutting line to your natural hand position rather than bending or reaching.
- Feet shoulder-width apart, weight evenly distributed. Shifting your weight to one foot tilts your shoulders, which tilts your fingers, which tilts the line.
- Move your feet, not your torso. When transitioning between sections, physically step to the next position. Reaching across your body while your feet stay planted introduces over-direction.
- Use minimal thumb motion on the shear. Let the ring finger hand guide the blade. Excessive thumb force pulls the shear off the intended cutting angle.
The role of the traveling guideline
The traveling guideline is what makes blunt cutting scalable from a two-inch nape section to a full perimeter. Understanding how it works prevents the most common blunt cutting errors:
- What it is: A thin sliver of already-cut hair included in each new subsection. It shows you the exact length to match.
- Why it works: Each section references only its immediate neighbor, so small errors do not compound across the entire head. If section 5 is slightly off, section 6 corrects back to the guideline rather than drifting further.
- How to maintain it: Take subsections no wider than 0.5–1.0 cm. Wider sections bury the guideline inside too much uncut hair, making it invisible. If you lose sight of the guideline, stop, re-comb, and re-section before cutting.
- Stationary vs traveling: A stationary guideline (used in layering) brings all hair back to one fixed point. A traveling guideline moves with you. Never mix the two in a blunt perimeter cut.
Troubleshooting chart
| Symptom | Cause | Solution |
|---|---|---|
| Hollow spots | Over-direction or inconsistent elevation | Recut section with comb tension at natural fall; check body position |
| Frayed line | Shears dull or tension inconsistent | Follow Daily Shear Care Protocol and test on tissue |
| Heavy perimeter | Subsections too large | Take smaller subsections (0.5 cm); include visible guideline |
| Line rises at the sides | Pulling hair forward during side sections | Let hair fall naturally; stand at the side, not in front |
| One side longer than the other | Body position shifted or tension varied | Cross-check both sides simultaneously using the mirror; recut the shorter side |
Practice regimen
- Perform 3 mannequin bob cuts per week, varying the starting length and elevation.
- Time each service and record outcomes to monitor improvement.
- After each cut, photograph the perimeter from behind, both sides, and the front. Compare across sessions.
- Review with a mentor monthly, using video feedback of your body position and hand mechanics.
Advanced variations
- Soft stacking: Add 5–10 degrees of elevation at the nape to create subtle internal layering while maintaining a strong external line.
- Graduated blunt: Increase elevation progressively from nape to occipital bone for a wedge-shaped weight line. Requires precise elevation control.
- Blunt with textured interior: Combine with point cutting for internal texture while keeping the external perimeter line strong and unbroken.
- Disconnected fringe on a blunt base: Cut the fringe as a separate section with its own guideline, then use slide cutting to blend the transition zone.
For tool care between blunt cutting sessions, follow the daily maintenance protocol and check your sharpening frequency based on your steel type and client volume.
See Also
Verified Sources
- Primary Sassoon Academy — Techniques (educational institution)
- Secondary 🇯🇵 JobVR — Haircut Types Guide (education reference)
- Tertiary 🇯🇵 Ofa-s Hair Salon — Cutting Techniques Column (salon professional blog)
Frequently Asked Questions
Use 5.5 to 6.0 inch shears with a micro-serrated or balanced convex edge. Micro-serrated edges grip the hair for clean blunt lines while convex edges provide a smoother finish. Mina and Ichiro offer well-regarded options in this range.
Keep fingers parallel to the floor, maintain consistent tension through each subsection, and step back after every small section to confirm the line in the mirror. Use a traveling guideline moving forward in small sections for evenness.
Hollow spots typically result from over-direction or inconsistent elevation. Recut the affected section with comb tension at natural fall. Take smaller subsections of about 0.5 cm and stand directly in front of each section to avoid angular distortion.